Once you know about the general dimensions of the board and ships, you should learn about the maneuvers. They are the core element of the game. Some people are better at estimating positions from their professions, years of other tabletop games or other reasons. Others practice a lot – which is possible and really helps. I will look at small bases myself, as I’m drawn to them. The guide for medium bases was written on backtodials.com, check it out! I will not cover formation movement here in any way. This is all about the one individual ship and how you can guess where a maneuver will take it.
Before I start, a general tip on how to practice: put your ship down and decide on a maneuver. Next, take a second ship and place it where you think that maneuver lands it. Then check how correct you were by placing the template down. This is a game or way of training that is probably as old as X-wing itself and I would not know who to credit.
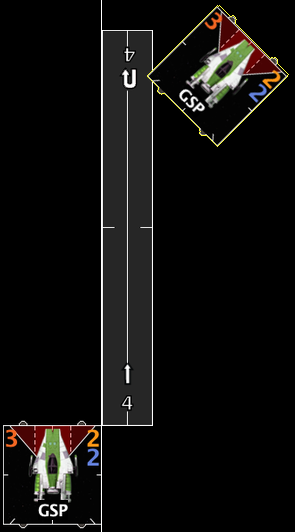
First off about small bases, take a look at this “Beginner’s Guide to Maneuvers” on the Space Owl blog. It shows you where the maneuvers land a ship in relation to their own position. You can have the same information from this picture below, but I don’t know the source and can’t credit whoever made it (please let me know if you did!).

For some people like me, it is easier to memorize numbers than images. I used this template from backtodials.com and added ships in the correct size. I always want to know two things:
- Do I move past this thing that is close to me?
- Can I fully execute my maneuver without overlapping or bumping into what is far from me?
For these questions, I need to know the distance of the corners.

The figure above shows distances from leading edge midpoint to trailing edge midpoint (thanks to user /ivo004 for spotting this possible source of confusion!) and these “midpoints” are one way to look at template distances. But for me, going from corner to corner is more intuitive and easy to remember. I overlaid the bases onto the original image, and for the banks I added the distances to the different corners.
What does that tell me? One by one.

Turns:
Looking at the 1 hard first, where the trailing edge midpoint is 0.88 bases from the leading edge midpoint position, both on x- and y-dimensions. As mentioned, I want to use the corners. That means that the x- and y-distances between the closest corners are 0.38, which is almost exactly the width of a range ruler (0.375 or 1.5cm). You get these 0.38 simply by subtracting half a base from the original 0.88 bases. The top left corner is then 1.38 forward or just below 1.5.
The 2 hard just clears an entire ship. Exact numbers are 1.08 x and y distances between the closest corners, but it is just a bit more than 1. That means the outer edges are just more than distance 2 away from your starting position. I’ve found that this is the most basic distance to estimate, and many forget about the 0.08 extra, which often matters when you want to do a tight maneuver.

The 3 hard turn is “just below 2” as distances for both x and y. But that is a tricky way to memorize it, because it adds up to 1.75 and 2.75, near and far respectively. The 2-turn can be memorized with “just above” because the 0.08 are very hard to estimate.
And one handy trick for the end: if you tilt your screen 45°, you notice that the bottom corner is always at the same height. That means you can never clear this line with only the maneuver – see the image below. Accordingly, you can be sure that a turn at the board edge will never leave the mat, and that is true for all base sizes.

Banks:
Banks are difficult. Most of us make a mistake every now and then, misjudging the distance of a bank. One reason is that the 45° angle changes the “size” of a base from 1 to 1.41 due to the rotation. Banks are also very important to me, as my favorite action is the 1bank boost. There are some tricks to keep the dimensions in mind. One is that your back corner will always clear your middle line. This is true for all banks on all ship sizes except the 1bank on the large base. There you won’t clear the middle line.


1-Bank: Starting with the near corner. The forward distance of the 1-bank is just above 1 at exactly 1.05 ship lengths. That means you will clear a small base ship that touches you – with the exception of your corner hitting the nub. But it also means that you probably won’t if it doesn’t touch you, so be careful about that. The far corner will just hit the range 1 edge. It even goes slightly past it to 2.51, as the distance of 2.46 is moved by 0.5+(the distance from the arc to the side of the base) to the side, while range 1 is 2.5 directly ahead. Just remember that range 1 and you’re golden. Another useful trick is to memorize this distance during the combat phase when you can legally measure the distance to your target. Chances are that you forget due to all the extra action, I know I do. But it is handy to keep this in mind if possible. With that, near and far corners are covered. What about the sides? I will call positions closer to the bullseye arc “proximal”, and positions further away “distal” to be unambiguous (see image above). The proximal corner will not just clear your middle line, but also your bullseye. Now that we have this printed on the bases, we can use it to get a more precise visual aid for the maneuver. Another visual aid is the line along your ship edge. The 1-bank will not clear this with the proximal corner. The distal corner moves 1.2 bases to the side.


The 2-bank is a move that we often choose to clear stress while also moving fast and adjusting the angle of the firing arc. With my Resistance A-wings, I almost never did a 2-bank, as they have the blue 3-bank. But the 2-bank became very important to me with the 2-sloops on the Aethersprites. I had to polish this specific maneuver again, as I had gotten rusty. The near corner moves 1.95 forward, just below 2 ships. This is important to remember, as you won’t clear a large base! It is also important because “length 2” is relatively easy to estimate. The side movement of that near corner is 0.8, placing it into the “almost a ship base” order of magnitude. Or for the trigonometrically inclined, the distance is almost exactly half the diagonal ship. But you can memorize “rear: 1side-2forward” and end up very close to the actual position. The proximal corner will move 0.1 to the side. And this is best memorized by knowing that you clear your own ship sideways. The tricky part is to get the distance right if overlapping with your maneuver is important! The distal corner is 1.5 bases to the side. You can memorize a distance of 2 if you have to complete the maneuver, but 1.5 works for me. The far corner moves a whopping 3.36 forward and this is the worst number of them all. That is too far above length 3 to memorize 3, and there is no way to help with the distance “3.5” either. This is the maneuver that I have no shortcut for, and it is the one that messes most with me. A 2sloop near the board edge? I will be disproportionately nervous.
The 3-bank is one of the best maneuvers to throw the game. I have seen it so often, someone ahead misjudged the side movement or forward movement, or even the angle. This template just throws off people, myself included. The near corner moves 2.8 forward and 1.2 to the side. That is close enough to estimate 1 and 3, but it is also different enough to land you in trouble. The proximal corner is almost half a ship size to the side – the width of a template. Accordingly, the distal corner is just below 2 to the side (1.41+0.47 to be exact). Both move almost-but-not-quite 4 ships forward. It is very close to these dreaded 3.5 from earlier, the value with no real comparison. The far corner moves 4.2 forward. When I estimate a 3-bank, I go 4 forward and 1 to the side, and then I add a safety margin. Funnily enough, that is 0.2 for both directions, half the width of a range ruler if that helps anyone… Anyway, from the forward corner I then remember to turn the ship and move along the edges. This is an overly complicated way, I know. Please let me know your trick on how to estimate a 3-bank, I’m very interested in doing it better!
Combinations: Maneuvers with Repositioning!
What if you already know: that maneuver you just dialed in won’t land you where you need to go. You will use a barrel roll or a boost on top. Now it gets complicated! This is not necessarily fundamentals anymore, but hopefully useful information nonetheless.
Bank vs Straight+Boost: In a tournament on the final table, I made an important mistake: I underestimated the difference between a 3-bank and a 2-straight+1-bank. I went backward from faster to slower maneuvers, knowing that the distance to the side would be the same. Then I decided that I might as well just bank because it is basically the same. But it is not! In the image below you will see the 4 different straights of an A-wing or Aethersprite followed by a banking boost. There is also a 3-bank for comparison. By now we know that the 3-bank moves almost an entire ship (0.7) further to the side! That did cost me the game as I did not get a modified range 1 shot and instead rolled a hit to give my opponent half points.

3-Bank + Boost: There are two directions to go with a bank+banking boost. If you want to move forward then bank+boost is fast. It is not as fast as a 5-straight + straight or even banking boost (which covers the huge distance of 8.4 ship lengths with the front corner!). But It has a great additional advantage of moving sideways by a bit more than a medium base or 1.5 ship lengths! This can be a useful maneuver when you want to move around an obstacle or another ship.

The other version boosts in the same direction as the initial bank, turning it into a stretched turn. And this, for the 3-bank, ends at a very neat spot that is easy to estimate. You will move like the combination a 3-straight sideways and 4-straight forward. The 3-turn moves two ships less in the forward direction (as the 4-straight) and more than a ship less in lateral movement. 3-bank+boost is also one more ship “sideways” distance than a 3-turn + roll, in the direction of the 3straight below.

Turns vs Bank+Boost: After looking at the 3-bank+boost, let me compare the 3 different turns with the 3 different banks followed by a banking boost. Even 1bank+1bank is a wider turn than a 3-hard turn. In fact, the 6 different maneuvers form a surprisingly regular pattern. Of course, it is not perfect, but quite close still. This way you should be able to always find the perfect maneuver for your range control and side movement to clear an obstacle, get a shot or dodge an arc.

Going really fast: There are five very fast combinations of which I want to highlight three different kinds a bit more. They are useful when you need to go fast, to dodge an arc or to get more distance for regenerating a shield, turning a crit or other reasons. The slowest of these three starts with a 3-bank, followed by a barrel roll forward and then a 1-bank. This moves you just below a 7-straight forward and a range ruler sideways. Next is a 5-straight with a straight boost. This is easy to count up, it’s 5+1+1, making it as fast as a 7-straight forward with no lateral movement. The fastest combination is to do a 5-straight with a banking boost, followed by a barrel roll! This is the only option of these three movements to leave the own firing arc by the way. The forward movement is just above 8.5 ships, with almost no lateral movement – but the firing arc gets turned by 45°! There is a fourth and fifth maneuver that is fast: a 3- or 4-straight + boost + roll. The 4-straight will be faster than a 3-bank+roll+boost or just a 5-straight + straight boost. And the 3-straight + boost+roll is basically as fast as a 3-bank+roll+boost, but the firing arc is turned by 45°. However, there is no conceptual difference between those and the 5-straight+boost+roll.

1-Hard + Barrel Roll: Those were large movements. Let’s go to the opposite, 1hards and rolls. A 1hard +roll backward will end you at almost the same place as you started – but a ship sideways. A very useful maneuver to stall for time and wait until your opponent committed to a lane or one of your ships. I used this recently as my first turn maneuver after setting up facing the sides. That way, I just stayed where I was and could let my opponent move through the obstacles as I wanted to fight in the open space.
If you roll in the other direction, the final position will be at a very similar place as a 2-bank, but 90° turned instead of the 45° from a bank. Another way to remember that position is a 2-straight and shifting to the side by one ship. You see that it’s a bit more, so be careful with this memory hook.

Red Maneuver + Boost: Another one that I’m interested in due to the Aethersprites: repositioning after a red maneuver! That is possible with R4-P17, Afterburners, or simply Anakin’s ability. The image might be a bit confusing. One by one: a sloop and a bank towards your starting point land you basically adjacent to where you came from. Banking in the other direction is almost like a 2-turn with moving a base backward. And a 4-kturn with boost lands you at almost the exact same position but turned by 45°.

This is just a small selection of combined maneuvers, and it does not even touch upon the ones that really complicated things: pre-movement repositioning! Supernatural Reflexes, Advanced Sensors, Inertial Dampeners, Adaptive Ailerons: the mechanic is interesting and adds a whole different layer on top. Good players can end up exactly where they want. If you want to know about the possibilities, check out the X-wing mapper. There you can play around and figure out how to end up at the position of your dreams. Below you see an example of Kylo with a dialed-in 1hard maneuver. It’s bonkers!

So far, we’ve seen the dimensions of the mat, ranges, ships, and maneuvers for small ships. I have linked amazing articles for turn zero and obstacle selection and placement, I won’t write about that myself as I couldn’t possibly add anything of value. The next topics can go into different, largely unconnected directions and of increasing complexity:
- Dice and their Modifications;
- List Building;
- Know Your Enemy and Target Priority;
- Openings;
- Formation Flying;
- Arc Dodging and Escaping;
- Win Conditions;
- Squad Harmony and Turn Mapping;
Many of these topics are covered very well and thoroughly already, so I will have to see whether I can add something or provide a new perspective. But that was it for now on the very basics. Until next time!
Addendum: The initial version of the article had a mistake with range rulers, and I was even more confusing. I hope I could clear it up, but please let me know if there are more problems or questions. I have also corrected too many grammar and spelling mistakes.

Addendum 18.5.19: Another way to look at banks:

What you can do is to turn your ship in your head by 45°. A shortcut is to use the nubs, as you can see that the nubs are exactly where the ship is cut off. This gives you two informations, one about sideway movement and the other about forward movement:
- The line along the ship’s edge is pretty much where the 1bank will end you. A 2bank will move sideways by almost exactly the width of a range ruler, and the 3bank again by the same amount. Check how the bullseye markers line up between 1bank and 2bank, and again 2bank and 3 bank! That is probably good enough for eyeballing on the table.
- The forward movement is just a bit above the corresponding straight as soon as you turned the ship 45°! It is virtually identical for the 3bank, quite close for the 2bank, and off by roughly a quarter base on the 1bank.
I will try this way to think about banks myself, but it should be a good trick to visualize, similar to moving sideways when taking a turn.

Really liking your work, both here and the FFG forums.
Nice one 🙂
LikeLike
Hi
Very good articles!
You can also use the line that passes through the nubs for the banks
LikeLike